
Affiliate Disclosure: This post may contain affiliate links. If you make a purchase through these links, we may earn a commission at no extra cost to you. For more information, please see our affiliate disclosure.
Introduction
Imagine the vibrant taste of sun-ripened tomatoes, captured at their peak and ready to elevate your meals all year long. Canning homemade tomato sauce is a time-honored tradition that brings incredible flavor and satisfaction to any kitchen. Forget bland, store-bought versions; with this guide, you’ll learn how to create a rich, delicious, and safely preserved tomato sauce that’s perfect for homemade spaghetti sauce, pizzas, and countless other dishes. For more inspiration on preserving the harvest, check out easy canned tomato sauce recipes.
Preserving your own tomato sauce not only allows you to enjoy the freshest ingredients but also provides peace of mind, knowing exactly what goes into your food. Whether you’re a seasoned canner or new to the world of food preservation, our step-by-step recipe and essential tips will make the process straightforward and rewarding. Get ready to transform your summer harvest into a pantry full of flavorful goodness!
Ingredients
- 20-25 lbs ripe paste tomatoes (such as Roma, San Marzano, or Amish Paste)
- 1-2 tbsp canning salt (optional, to taste)
- 1/4 cup bottled lemon juice or 1/2 tsp citric acid per quart jar (adjust for pint jars)
- Optional: fresh basil, oregano, garlic (add after opening jars for best flavor and safety, or use dried herbs if adding before canning, following tested recipes)
Product Spotlight
Step-by-Step Instructions
Step 1: Gather Your Equipment
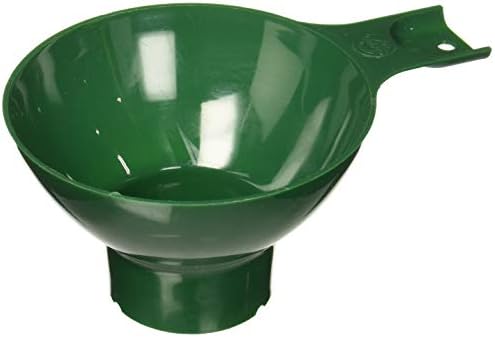
Before you begin, ensure you have all the necessary canning equipment. This includes a large stockpot for cooking tomatoes, a food mill or blender, a large water bath canner with a rack, glass canning jars (quart or pint size), new lids, screw bands, a jar lifter, a canning funnel, and a bubble remover/headspace tool. Having everything ready makes the process smooth and efficient. Consider investing in a comprehensive guide like the Ball Complete Book of Home Preserving if you’re just starting out.

Step 2: Prepare Your Tomatoes
Wash your ripe tomatoes thoroughly under cool running water. Remove any stems and core the tomatoes. You can cut larger tomatoes into quarters or halves to make them easier to cook. For the best sauce, choose firm, blemish-free paste tomatoes, which have less water content and more flesh, resulting in a thicker sauce. For more tips on selecting ingredients, refer to resources like The Old Farmer’s Almanac’s canning guide.

Step 3: Cook the Tomatoes
Place the prepared tomatoes into a large stockpot. Cook over medium-high heat, stirring frequently, until the tomatoes soften and release their juices. This usually takes about 15-20 minutes. If you’re using a large batch, you might need to do this in stages. Softening the tomatoes makes them much easier to process into a smooth sauce.

Step 4: Process the Tomatoes into Sauce
Once softened, carefully transfer the cooked tomatoes to a food mill to separate the skins and seeds from the pulp. A good food mill is highly efficient for this step, yielding a smooth, consistent sauce. Alternatively, you can use an immersion blender to puree the tomatoes directly in the pot, then strain the sauce through a fine-mesh sieve if you prefer to remove any remaining skins and seeds for an ultra-smooth finish. This step is crucial for achieving the desired texture for your sauce.

Step 5: Simmer and Reduce the Sauce
Return the smooth tomato pulp to the clean stockpot. Bring the sauce to a gentle simmer over medium heat, stirring occasionally to prevent it from sticking to the bottom. Continue to simmer, uncovered, for 1-3 hours, or until the sauce reaches your desired thickness. This reduction process is vital for concentrating the flavors and achieving a rich consistency. The longer you simmer, the thicker and more intensely flavored your sauce will become. For additional ideas on sauces, check out classic bolognese sauce recipe.

Step 6: Prepare Jars and Lids
While your sauce is simmering, prepare your canning jars. Wash canning jars thoroughly in hot, soapy water, rinse them well, and keep them hot until ready to fill. You can do this by placing them in a simmering water bath or a warm oven (around 200°F/93°C). This prevents thermal shock and potential breakage when the hot sauce is added. Place new canning lids in a small saucepan with water and bring to a simmer (do not boil) to soften the sealing compound. Keep screw bands clean and accessible.

Step 7: Add Acid and Fill Jars
Before filling each hot jar, add the required amount of acid: 1/4 cup bottled lemon juice or 1/2 tsp citric acid per quart jar (use half for pint jars). This step is absolutely critical for food safety, ensuring the tomato sauce has a sufficiently low pH for safe water bath canning. Carefully ladle the hot tomato sauce into the prepared jars, using a canning funnel to keep the rims clean. Fill each jar, leaving 1/2 inch of headspace from the top.

Step 8: Remove Air Bubbles and Clean Rims
Once filled, use a non-metallic spatula or a special bubble remover tool to gently slide around the inside of each jar. This helps release any trapped air bubbles that could interfere with sealing. If the headspace reduces significantly after removing bubbles, add a little more hot sauce to bring it back to 1/2 inch. Next, wipe the rims of the jars thoroughly with a clean, damp cloth to remove any food residue. Any sauce on the rim can prevent the lid from sealing properly. Finally, place a hot lid on each jar, followed by a screw band, tightened only to fingertip-tight; do not overtighten.

Step 9: Process Jars in Water Bath Canner
Carefully place the filled jars onto the rack in your preheated water bath canner. Ensure the jars are fully submerged by at least 1-2 inches of water; add more hot water if needed. Bring the water in the canner to a rolling boil. Once the water is vigorously boiling, start your timer. Process quart jars for 40 minutes (or pint jars for 35 minutes). Remember to adjust processing times for your specific altitude, consulting a reliable canning chart for accurate information. For safe canning practices, you can consult reliable sources like Simply Canning.
Step 10: Cool and Check Seals
Once the processing time is complete, turn off the heat and carefully remove the canner lid. Let the jars sit undisturbed in the hot water for 5 minutes before carefully removing them with a jar lifter. Place the hot jars on a towel-lined surface or a wire rack, ensuring they are not touching each other, and allow them to cool completely, undisturbed, for 12-24 hours. As they cool, you’ll hear the satisfying ‘ping!’ of the lids sealing. After cooling, check seals by pressing the center of each lid; it should not flex or pop. Remove screw bands, wipe jars clean, label them with the contents and date, and store in a cool, dark place. Any unsealed jars must be refrigerated and used within a week. A reliable water bath canner will make these steps much easier.
The Ultimate Guide to Canning Homemade Tomato Sauce
Ingredients
- 20-25 lbs ripe paste tomatoes (Roma, San Marzano, Amish Paste)
- 1-2 tbsp canning salt (optional, to taste)
- 1/4 cup bottled lemon juice or 1/2 tsp citric acid per quart jar (use half for pint jars)
- Optional: fresh basil, oregano, garlic (add after opening jars for best flavor and safety)
Instructions
- Before you begin, gather all your canning equipment. You’ll need a large stockpot for cooking tomatoes, a food mill or blender, a large water bath canner with a rack, glass canning jars (quart or pint size), new lids, screw bands, a jar lifter, a canning funnel, and a bubble remover/headspace tool. Ensure all equipment is clean and in good working order. Having everything laid out and ready makes the entire canning process much smoother and more enjoyable.
- Wash your ripe tomatoes thoroughly under cool running water. Remove any stems and core the tomatoes. You can cut larger tomatoes into quarters or halves to make them easier to cook down. For the best sauce, choose firm, blemish-free paste tomatoes, which have less water content and more flesh. This characteristic helps create a naturally thicker sauce with a more concentrated flavor, reducing the overall cooking time needed.
- Place the prepared tomatoes into a large stockpot. Cook over medium-high heat, stirring frequently, until the tomatoes soften and release their juices. This usually takes about 15-20 minutes. If you’re using a large batch, you might need to do this in stages. Softening the tomatoes makes them much easier to process into a smooth sauce. Continue stirring to prevent any scorching at the bottom of the pot.
- Once softened, carefully transfer the cooked tomatoes to a food mill to separate the skins and seeds from the pulp. A food mill is highly efficient for this step, yielding a smooth, consistent sauce. Alternatively, you can use an immersion blender to puree the tomatoes directly in the pot, then strain the sauce through a fine-mesh sieve if you prefer to remove any remaining skins and seeds for an ultra-smooth finish. This step is crucial for achieving the desired texture for your sauce.
- Return the smooth tomato pulp to the clean stockpot. Bring the sauce to a gentle simmer over medium heat, stirring occasionally to prevent it from sticking to the bottom. Continue to simmer, uncovered, for 1-3 hours, or until the sauce reaches your desired thickness. This reduction process is vital for concentrating the flavors and achieving a rich consistency. The longer you simmer, the thicker and more intensely flavored your sauce will become. Be patient, as this step truly makes the sauce shine. For additional ideas on sauces, check out classic bolognese sauce recipe.
- While your sauce is simmering, prepare your canning jars. Wash canning jars thoroughly in hot, soapy water, rinse them well, and keep them hot until ready to fill. You can do this by placing them in a simmering water bath or a warm oven (around 200°F/93°C). This prevents thermal shock and potential breakage when the hot sauce is added. Place new canning lids in a small saucepan with water and bring to a simmer (do not boil) to soften the sealing compound. Keep screw bands clean and accessible.
- Before filling each hot jar, add the required amount of acid: 1/4 cup bottled lemon juice or 1/2 tsp citric acid per quart jar (use half for pint jars). This step is absolutely critical for food safety, ensuring the tomato sauce has a sufficiently low pH for safe water bath canning. Carefully ladle the hot tomato sauce into the prepared jars, using a canning funnel to keep the rims clean. Fill each jar, leaving 1/2 inch of headspace from the top.
- Once filled, use a non-metallic spatula or a special bubble remover tool to gently slide around the inside of each jar. This helps release any trapped air bubbles that could interfere with sealing. If the headspace reduces significantly after removing bubbles, add a little more hot sauce to bring it back to 1/2 inch. Next, wipe the rims of the jars thoroughly with a clean, damp cloth to remove any food residue. Any sauce on the rim can prevent the lid from sealing properly. Finally, place a hot lid on each jar, followed by a screw band, tightened only to fingertip-tight; do not overtighten.
- Carefully place the filled jars onto the rack in your preheated water bath canner. Ensure the jars are fully submerged by at least 1-2 inches of water; add more hot water if needed. Bring the water in the canner to a rolling boil. Once the water is vigorously boiling, start your timer. Process quart jars for 40 minutes (or pint jars for 35 minutes). Remember to adjust processing times for your specific altitude, consulting a reliable canning chart for accurate information. This heat processing kills spoilage microorganisms and creates a vacuum seal.
- Once the processing time is complete, turn off the heat and carefully remove the canner lid. Let the jars sit undisturbed in the hot water for 5 minutes before carefully removing them with a jar lifter. Place the hot jars on a towel-lined surface or a wire rack, ensuring they are not touching each other, and allow them to cool completely, undisturbed, for 12-24 hours. As they cool, you’ll hear the satisfying ‘ping!’ of the lids sealing. After cooling, check seals by pressing the center of each lid; it should not flex or pop. Remove screw bands, wipe jars clean, label them with the contents and date, and store in a cool, dark place. Any unsealed jars must be refrigerated and used within a week. A reliable water bath canner will make these steps much easier.
FAQ Section
How long does homemade canned tomato sauce last?
Can I add herbs and spices before canning?
Do I really need to add lemon juice or citric acid?
Conclusion
Canning your own homemade tomato sauce is a truly rewarding endeavor, connecting you to the bounty of the harvest and providing a delicious, healthy staple for your pantry. With this comprehensive guide, you’re well-equipped to create flavorful, safely preserved tomato sauce that will be the star of countless meals. For more advanced techniques and troubleshooting, resources like Practical Self Reliance can provide further insights. Enjoy the taste of summer, all year long!
Pin This Review For Later
Save this honest buying guide & pros/cons summary directly to your Pinterest Kitchen or Gadgets board!